Running playbooks
Depending on the Absolute product licenses associated with your account, the Playbooks feature (also known as Absolute Rehydrate) may not be available.
When the Playbooks policy is activated, you can submit a Run playbook request to remotely:
- Repair or reimage a Windows device
-
Recover a Windows device that fails to boot into Windows as the result of a fatal system error
Playbooks
In the current release, the following playbooks are available:
Select the File operations playbook to remotely:
- Download a file to a device from a server, or one of the following file hosting services:
- Box
- Dropbox
- Google Drive
- OneDrive
- Delete a file from a specified location on a device.
Your playbook can include up to 20 file actions. The actions are run in the order you specify in the playbook.
Requirements
- If you are adding a file, note the following:
- If the file is stored on a file-sharing service, only direct download links are supported in the Host file URL field.
 About direct download links
A direct download link is a URL that links directly to the file, allowing it to be downloaded immediately. In contrast, a shared link usually links to an intermediate webpage containing a link to initiate the download.
In most cases, a direct download link includes the file name and extension, while a shared link does not.
To generate a direct download link instead of a shared link, refer to your file-sharing service documentation for the correct URL format or link generation method.
- The file must be stored in a location that is not password-protected.
To ensure the file is secure, it's best practice to create an AWS pre-signed URL.
- If the file is stored on a file-sharing service, only direct download links are supported in the Host file URL field.
Select the Restore from image playbook to use an image A snaphot of a hard drive that includes the operating system, settings, and installed software required by your organization. It serves as a template to ensure consistent and efficient device provisioning. It is also known as a system image or a base image. to remotely reimage existing devices, or set up new devices.
Requirements
-
Free disk space on each device must be greater than the file size of the image file that is downloaded.
-
The image has been stored in an accessible location on a server, or on each device.
Using a script to download an image on your devices
Before running the Restore from image playbook, you can run a PowerShell script to remotely add an image file to your devices.
The Absolute recovery image deployment utility script is available in the Script library. It performs the following actions:
-
Compresses a device's C: drive to free up space for a new partition
-
Creates and formats an NTFS partition with the partition label specified in the script
-
Downloads an ISO or WIM image to the partition and encrypts it
The script requires PowerShell 7 or higher. If a lower version of PowerShell is installed on a device, PowerShell 7 is automatically installed.
To run the script:
- Select the applicable devices and submit a Run Script request using the Absolute recovery image deployment utility script. The request is sent to the device on its next connection to the Absolute Monitoring Center.
If you do not enter a partition label (maximum 10 characters) in the VolumeLabel field, the partition label defaults to RECOVERY.
-
Track the progress of your Run Script request in Action History. The script may to take up to 40 minutes to run. After devices show an Action status of Succeeded, you can run the Restore from image playbook.
If the image is stored on a file-sharing service, you need to use a direct download link to specify its location.
-
-
The file format of the image is one of the following:
Format Image download requirements Windows Disk Image (ISO) Ensure that the following files are uploaded to the storage location:
-
Windows Disk Image (.iso)
If you are using an ISO image that is stored locally on the device, you don't need to upload it.
- Answer file (unattend.xml or autounattend.xml)
For more information about creating an answer file, see Microsoft documentation.
- Manifest file in JSON (.json) file format
This file contains the URL or path to each of the above files.
Creating a manifest file for an ISO imageTo create a manifest file:
- Open a new file in a text editor, such as Notepad ++.
- Do one of the following:
If the ISO file is stored on a server, copy the following code and paste it in the file:
Copy{
"answer_file": "https://<abc.server.com/unattend.xml",
"image_file": "https://abc.server.com/windows_image.iso"
}If the ISO file is stored locally on the device, copy the following code and paste it in the file:
Copy{
"answer_file": "https://abc.server.com/unattend.xml",
"image_file": "local://<partition label>/<path to file>/windows_image.iso"
}
Edit the code by entering the URL of the location where each file is stored. Ensure that you've tested each URL in a browser before continuing to the next step.
Note the following:
- If a file is stored on a file-sharing service, use a direct download link to specify its location.
To run the playbook using a locally stored image, the path must include a partition label.
Find a partition labelOn the device, open a Command Prompt window as an Administrator.
Type Diskpart and press Enter. The Diskpart tool opens.
Type list vol and press Enter. The complete list of partitions and their labels shows. Note that some partitions may not have a label.
If you used the Absolute recovery image deployment utility script to add an image to your devices, the partition label is specified in the script.
If you do not specify a valid partition label in the image_file parameter, the playbook will fail to run.
- Save as a JSON (.json) file.
Captured Windows Image (WIM) Ensure that the following files are uploaded to the storage location:
- Captured Windows Image (.wim)
To capture a WIM image, ensure that you follow the instructions provided in Microsoft documentation.
If you are using a WIM image that is stored locally on the device, you don't need to upload it.
- Manifest file in JSON (.json) file format
This file contains a parameter that resets (removes and recreates) a device's partitions, and contains the URL or path to the Windows image file.
Creating a manifest file for a WIM imageTo create a manifest file:
- Open a new file in a text editor, such as Notepad ++.
- Do one of the following:
- If the Window image file is stored on a server, copy the following code and paste it in the file:Copy
{
  "reset_par":true,
  "image_file": "https://abc.server.com/captured_image.wim"
}
If the Window image file is stored locally on the device, copy the following code and paste it in the file:
Copy{
"reset_par":true,
"image_file": "local://<partition label>/<path to file>/captured_image.wim"
}
- If the Window image file is stored on a server, copy the following code and paste it in the file:
Edit the image_file parameter by entering the URL of the location where the image file is stored. Ensure that you've tested each URL in a browser before continuing to the next step. Note that if a file is stored on a file-sharing service, use a direct download link to specify its location.
Note the following:
- If the file is stored on a file-sharing service, use a direct download link to specify its location.
To run the playbook using a locally stored image, the path must include a partition label.
Find a partition labelOn the device, open a Command Prompt window as an Administrator.
Type Diskpart and press Enter. The Diskpart tool opens.
Type list vol and press Enter. The complete list of partitions and their labels shows. Note that some partitions may not have a label.
If you used the Absolute recovery image deployment utility script to add an image to your devices, the partition label is specified in the script.
If you do not specify a valid partition label in the image_file parameter, the playbook will fail to run.
- Save as a JSON (.json) file.
-
Select the Run script playbook to remotely run a script on a Windows device.
Note that the script content is pasted into a text field in the Run playbook dialog. You can't upload a file.
To specify the URL of a script file, use the Run script from file playbook.
Requirements
-
The following script types are supported:
-
Batch (.bat) script
-
PowerShell (.ps1) script
For PowerShell scripts, ensure that "#PS" is added at the beginning of the script.
-
-
The script cannot exceed 3 KB in size.
Select the Run script from file playbook to remotely run a script on a Windows device.
This playbook lets you run a script that you've stored in an accessible location. It provides an alternative to the Run script playbook, which requires you to paste the script content into a text field.
The script can be stored on a server, or one of the following file hosting services:
- Box
- Dropbox
- Google Drive
- OneDrive
Requirements
-
The following script types are supported:
-
Batch (.bat) script
-
PowerShell (.ps1) script
For PowerShell scripts, ensure that "#PS" is added at the beginning of the script.
Scripts added to this playbook are not limited to a maximum file size.
-
- If the script is stored on a file-sharing service, only direct download links are supported in the Host file URL field.
Select the Set/remove registry keys playbook to remotely:
- Add a registry key
- Update a key value
- Remove a key value
Your playbook can include up to 20 registry key actions. The actions are run in the order you specify in the playbook.
When editing the Windows registry, always proceed with caution. A misconfiguration can lead to significant issues, such as system instability, application errors, or an inability to restart Windows. Ensure that you understand the full impact of your registry edits before running this playbook. For more information about the Windows registry, see Windows documentation.
Requirements
-
If the device's drive is encrypted by BitLocker Drive Encryption, enter the device's BitLocker recovery key or add the bitlocker recovery key variable in the playbook configuration. Note that if you don't enter it, the device user will be prompted to enter the key when the playbook runs on the device.
This playbook is not supported on devices encrypted by another encryption product.
- The HKEY_LOCAL_MACHINE registry hive is supported.
Other registry hives, such as HKEY_CURRENT_USER, are not supported.
- Removal of a registry key is not supported. You can only remove registry key values.
Format guidelines
When entering registry paths, ensure that you use:
-
HKEY_LOCAL_MACHINE for the registry hive. HKLM is not supported.
-
Backslashes (\)
If you copy the path from the registry editor, omit Computer\.
For example, HKEY_LOCAL_MACHINE\SOFTWARE\TestApp
Select the Multi operations playbook to combine actions from the following playbooks into a single Run Playbook request:
-
Run script
-
File operations (add or delete)
-
Set/remove registry keys
Your playbook can include up to 20 actions, and the actions will run in the order in which you add them.
Requirements
See the requirements of each playbook.
About device-initiated playbooks
You can run a playbook as a device-initiated playbook, or a console-initiated playbook.
When you submit a Run playbook request, you need to configure the Device-initiated playbook option, which controls how the playbook will be launched. There are two options:
| Option | Details | |
|---|---|---|
| Device-initiated |
Select the Device initiated playbook option if you want to try to recover devices that have experienced a fatal system error that's preventing them from booting into Windows.
Note the following about device-initiated playbooks:
If the device is not physically accessible, a device-initiated playbook request can run automatically by ensuring that the Automated playbook action setting is enabled in the device's Playbooks policy. Learn more |
|
| Console-initiated |
Leave the Device-initiated playbook option cleared if you want to run a playbook to repair or reimage a device. To run a console-initiated playbook, the device's operating system must be fully operational.
A console-initiated playbook is deployed to the device on its next connection to the Absolute Monitoring Center, and the playbook runs automatically. You can track the progress of your request in Action History. To complete a Run playbook request on a device, the Secure Endpoint Agent forces the device to restart. |
If a Run playbook request is already in progress on a device, you can submit a device-initiated playbook, but not a console-initiated playbook.
Submitting a Run playbook request
To run a playbook, your user role needs to be granted the Perform permission for Run playbook.
To view the following interface items on a device's Device Details page, your user role needs to be granted the View or Perform permission for Run playbook:
- Playbook requested banner
- Playbooks field
All default Administrator roles are granted these permissions.
To run a playbook, the following prerequisites must be met:
- The device meets the system requirements for this action.
- The device has not been reported stolen.
- The Playbooks policy is activated in the device's policy group.
- The device's Playbooks field shows a value of Enabled, meaning it is provisioned. Learn more
- At least 24 hours have elapsed since the policy was activated.
Before submitting a Run playbook request, verify that each device is provisioned to run playbooks. If a device is not provisioned, its action will immediately show an Action status of Failed in Action History.
A device may fail to be provisioned for one or more of the following reasons:
- The device does not meet the minimum system requirements for the Playbooks policy
- A configuration or process on the device is blocking provisioning
- An error occurred during the provisioning process
You'll know that a device failed to be provisioned when its Playbooks status fails to update from Not enabled to Pending and then finally Enabled.
To view provisioning status:
- Log in to the Secure Endpoint Console as a user with the View or Perform permission for Run playbook.
- On the navigation bar, click
 to open the Devices page.
 - [Optional] Filter the page to show only the devices for which you want to submit a Run playbook request.
- Add the following report columns to the page and review their values to determine if any devices failed to be provisioned:
Playbook > Status
Possible valuesEnabled: the Playbooks policy is activated on the device, and the device is provisioned to run playbooks.
An obscured playbook passcode The unique 12-digit passcode that a device user enters during the boot process to run a device-initiated playbook. After a device-initiated Run playbook request is processed on a device, a new passcode is automatically generated in preparation for the next request. (
 ) is also displayed.
Pending: the Playbooks policy is activated, but device provisioning is still in progress. A reboot may be required to complete provisioning.
- Not enabled: one of the following applies:
- The Playbooks policy is not activated, or
- The policy is activated, but the device failed to be provisioned
Deprovisioning: the device's Playbooks policy has been deactivated and device deprovisioning is in progress. A reboot may be required to complete deprovisioning.
An obscured playbook passcode The unique 12-digit passcode that a device user enters during the boot process to run a device-initiated playbook. After a device-initiated Run playbook request is processed on a device, a new passcode is automatically generated in preparation for the next request. (
) is also displayed.Not supported: the device does not meet the system requirements for the Playbooks feature
For more information about the specific requirements that were not met, review the information in the Playbooks > Status details report column.
Status details are not shown for the Enabled status.
Possible valuesIf any of the following values show, the device does not meet the minimum system requirements:
- 3rd-party CA must be active when Secure Boot is enabled
- Agent version update required
- Insufficient disk space to download recovery file
- OS does not meet minimum requirement
- Persistence 2.0 version not met
- Persistence not activated
- Persistence not supported
- Platform not supported
- TPM 2.0 not enabled
- TPM does not have endorsement key available
- TPM not activated
- TPM not owned
- TPM not enabled
- TPM version not 2.0 or higher
- Windows 10 and above not met
- x86_64 CPU architecture not met
For help resolving these issues, see Troubleshooting ineligible devices.
If the following value shows, reboot the device to attempt to resolve the issue and complete the provisioning process:
- Authentication key missing
Bootloader not activated
Persistence not fully enabled
Waiting for reboot
If rebooting the device does not resolve the issue, submit a Support case.
If one of the following values show, wait a few hours to see if the issue resolves itself and provisioning is completed:
BIOS settings check failed
OS check failed
Persistence check failed
TPM check failed
If the issue is not resolved, submit a Support case.
If the following value shows, disable the Deny write access to fixed drives not protected by BitLocker setting in the BitLocker Drive Encryption policy within Windows Group Policy:
BitLocker blocked write access to recovery partition
If the issue is not resolved, submit a Support case.
If any of the following values show, an error occurred and you will need to submit a Support case:
Currently unable to determine if device supports playbooks
Insufficient permissions to install recovery file
Bootloader generic error
Unknown error
If the device's drive is encrypted by BitLocker Drive Encryption, you will need to manually enter the device's BitLocker recovery key in the playbook's BitLocker Recovery key field. If your request includes multiple devices, you can't manually enter each device's recovery key, but you can use the Encryption > bitlocker recovery key variable.
To use the Encryption > bitlocker recovery key variable in a playbook's BitLocker Recovery key field, you need to configure the Secure Endpoint Agent to collect recovery keys from your Windows devices. You can enable this option after the Full Disk Encryption Status policy is activated in your policy groups. Learn more
Note that when this option is enabled, it only collects the BitLocker recovery key for a device's primary hard drive. If other system partitions are encrypted, their recovery keys are not collected.
Note the following:
-
If you don't enter a BitLocker recovery key (or the variable) in the playbook configuration, the device user will be prompted to enter it when the playbook runs on the device.
The Run script and Run script from file playbooks can only access encrypted C: system partitions and unencrypted secondary partitions. If the script is stored on an encrypted system partition, you must enter the device's BitLocker recovery key in the playbook configuration. If you don't, the device user will not be prompted to enter the recovery key, and the playbook will fail to run.
-
Playbooks are not supported on devices encrypted by another encryption product.
While configuring playbooks, you may need to enter device specific information, such as a file path on a device, or a device's BitLocker recovery key. You can use variables to specify this type of information. When the playbook runs on a device, the variable is replaced by the specific value for that device.
If you are submitting a request for multiple devices, and the playbook configurations require device specific information, you will most likely need to use a variable.
Playbooks support four types of variables:
-
Hardware (select fields only)
-
Encryption (bitlocker recovery key only)
-
Data points are assigned to devices at the policy group level. If you use a data point that is not activated and assigned to a device's policy group, the playbook will fail to be processed on the device and a Playbook failed event will be logged to Event History.
You can view the complete list of supported variables by clicking View list of variables on the Run playbook dialog. To add a variable to a field, click its Insert variable field and then search for and select a variable from the list.
|
You need to delete a file from 5 devices. The file is stored in the C:\Users\<Username>\AppData\Local folder, where <Username> is specific to each device. You create a File operations (add or delete) playbook request, and in the field under Delete file, you enter C:\Users\. To insert the username, you click Insert variable and select currentUsername from the list of variables. You can then enter the remainder of the file path.
|

- You can't cancel a Playbook request after it's submitted.
- If a Run playbook request is in progress on a device, a Playbook requested banner shows on the device's Device Details page. When this banner shows, you can submit a device-initiated playbook, but you can't submit a console-initiated playbook.
To run a playbook:
- Log in to the Secure Endpoint Console as a user with the Perform permission for Run playbook.
-
Do one of the following:
To run a playbook on a single device
On the Windows device's Device Details page, click
 >
>  Run playbook.
If the action is grayed out, one of the following conditions applies:
- The action isn't supported on the device's operating system
- A license upgrade is required
- The device's Agent status The operating condition of a device's Secure Endpoint Agent. Possible values are Active (indicates that the device's agent has connected to the Absolute Monitoring Center), Inactive (indicates one of the following: the device was moved to another account; the device was unenrolled, but it is now set to be reactivated; or the device had Persistence enabled at the factory, but it has not yet called in to the Absolute Monitoring Center), and Disabled (indicates that the agent is either flagged for removal or removed from the unenrolled device). Inactive and Disabled devices do not consume a license. is set to Disabled or Inactive
If a
 icon shows when you hover over Run playbook, the device is not eligible for the action.To run a playbook on multiple devices
- From the navigation bar, open a page that supports the Run playbook action. For example, open the All Devices page in the Devices area or open the Makes and Models report.
- In the work area, use the search field or filters to find the applicable Windows devices.
-
In the results grid, select each device you want to include in the request. To select all devices, select the Select All checkbox in the result grid header. To select consecutive devices, select the first device and then hold down the Shift key and select the last device. To remove all selections, click Clear all.
By default, this action type is limited to 500 total actions per day per account, but your Administrator can change this amount, or disable the setting. Learn more
If the setting is disabled, the limit per request is 1000 devices.
- Click > Run playbook.
Alternatively, you can upload a file of device identifiers and submit a request.
- Under Playbook, click the Select playbook field and select one of the following playbooks:
- All playbook parameter fields include an Insert variable field, which is optional. Learn more about using variables
- The system does not validate the values that you enter in each playbook's parameter fields. To help ensure that a playbook runs successfully, verify the parameters before adding them, and then enter them carefully. If a playbook fails to run successfully, a Playbook failed event is logged to Event History.
File operations (add or delete)- Review the playbook's requirements.
[Optional] Under Parameters, enter the device's BitLocker recovery key.
If your request is for multiple devices, use the Encryption > bitlocker recovery key variable. Learn more
- Click
 Add action and do one of the following:Add a file
- Click Add file.
- In the Host file URL field, enter the URL(HTTP or HTTPS protocol only) for the location where the file is stored. Learn more
In the File path field, enter the full path and file name of the location on the device to save the file. You can use the original file name, or a file name of your choosing.
For example, enter C:\Documents\Temp\Filename.txt
Note the following:
- Environment variables are not supported.
- If a file with the same file name already exists in the target location, the file is replaced by the downloaded file.
- If a folder in the specified path doesn't exist on the device, the Run playbook request fails.
- The added file's Date modified timestamp is based on the device's real time clock (RTC). If the device's display time has been adjusted in Windows date & time settings, the timestamp may not be in sync with the display time.
Delete a file- Click Delete file.
In the Path and file name to delete field, enter the full path to the file that you want to delete, including the file name. For example, enter C:\Documents\Textfile.txt. Environment variables are not supported.
- To add another action, repeat step c. The playbook can include up to 20 actions. To remove an action, click its
 icon.
icon. - Actions are performed in the order they are listed in the playbook configuration. To change the order of the actions, click an action's
 icon and drag the action to its new location.
If one action in the playbook fails, a Playbook failed event is logged to Event History, even if all other actions in the playbook are completed.
Set/remove registry keys- Review the playbook's requirements.
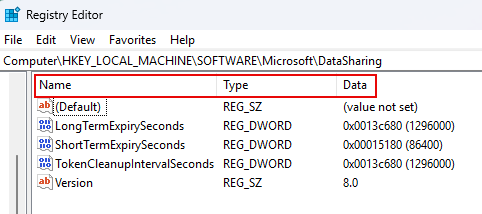
- [Optional] Open the Registry Editor on your local machine and find the key that you want to update or remove. For example:
- In the Windows Search field, type regedit.
- Click Registry Editor and click Yes in the User Account Control dialog.
Navigate to the registry key and make note of the Name, Type, and Data of the registry key value. Also note the registry key path.
- Return to the Secure Endpoint Console.
[Optional] Under Parameters, enter the device's BitLocker recovery key.
If your request is for multiple devices, use the Encryption > bitlocker recovery key variable. Learn more
- Review the playbook's format guidelines.
- Click Add action and do one of the following:Add a registry key value
- Click Set registry key.
- In the Registry path field, enter the path to the location where you want to add the new registry key value.
For example, enter HKEY_LOCAL_MACHINE\SOFTWARE\TestApp
- In the Registry name field, enter the name of the registry key value you want to add. In Registry Editor, this will show under Name.
- Under Registry type field, select the registry key value's type. In Registry Editor, this will show under Type.
- In the Registry value field, enter the data associated with the value. In Registry Editor, this will show under Data.
Update a registry key value- Click Set registry key.
- In the Registry path field, enter the path to the registry key value.
For example, enter HKEY_LOCAL_MACHINE\SOFTWARE\TestApp
- In the Registry name field, enter the name of the registry key value. In Registry Editor, this shows under Name.
- Under Registry type field, select the registry key value's assigned type. In Registry Editor, this shows under Type.
- In the Registry value field, enter the new data string. In Registry Editor, this value will replace the value under Data.
Remove a registry key value- Click Remove registry key.
In the Registry name field, enter the name of the registry key value that you want to remove. In Registry Editor, this is the value under Name.
You can't remove the (Default) value.
- In the Registry path field, enter the path to the registry key.
For example, enter HKEY_LOCAL_MACHINE\SOFTWARE\TestApp
- To add another action, repeat step d. The playbook can include up to 20 actions. To remove an action, click its (Remove) icon.
- Actions are performed in the order they are listed in the playbook configuration. To change the order of the actions, click an action's icon and drag the action to its new location.
If one action in the playbook fails, a Playbook failed event is logged to Event History, even if all other actions in the playbook are successful.
Restore from image- Review the playbook's requirements.
Under Parameters:
[Optional] Enter the device's BitLocker recovery key.
If your request is for multiple devices, use the Encryption > bitlocker recovery key variable. Learn more
In the Manifest file URL field, enter the URL (HTTP or HTTPS protocol only) for the location where the manifest file is stored. For details about creating a manifest file, see Creating a manifest file for an ISO image or Creating a manifest file for a WIM image.
If the file is stored on a file-sharing service, only direct download links are supported in this field.
- [Optional] If credentials are required to access the manifest file on the server, enter the applicable Username and Credentials (password, key, etc). For security reasons, values in the Credentials field are masked. To show the value, click (Show). To hide it again, click
 (Hide).
Run script- Review the playbook's requirements.
Open the script on your local machine and copy its contents.
- Under Parameters:
[Optional] Enter the device's BitLocker recovery key.
If your request is for multiple devices, use the Encryption > bitlocker recovery key variable. Learn more
- Click the Batch script text field and paste the script content.
If the script content exceeds 3 KB in size, an error message shows.
Run script from file- Review the playbook's requirements.
- Under Parameters:
[Optional] Enter the device's BitLocker recovery key.
If your request is for multiple devices, use the Encryption > bitlocker recovery key variable. Learn more
- In the Host file URL field, enter the URL(HTTP or HTTPS protocol only) for the location where the batch or PowerShell script is stored.
Multi operations- Review the requirements of the playbook actions you want to include.
[Optional] Under Parameters, enter the device's BitLocker recovery key.
If your request is for multiple devices, use the Encryption > bitlocker recovery key variable. Learn more
- Click Add action and add an action. For configuration details, see the applicable section above.
- Repeat step b for each action you want to add. The playbook can include up to 20 actions. To remove an action, click its (Remove) icon.
If one action in the playbook fails, a Playbook failed event is logged to Event History, even if all other actions in the playbook are successful.
- Under Options, do one of the following:
- If the device's operating system is fully operational, leave the Device-initiated playbook checkbox cleared.
When the option is disabled, the Run playbook request is deployed to the device on its next connection to the Absolute Monitoring Center, and the playbook runs automatically.
To complete the Run playbook request, the Secure Endpoint Agent forces the device to restart. If a device user is logged in at this time, they are automatically logged out and data may be lost. Therefore, before submitting a Run playbook request, contact the device user and instruct them to save their work.
Alternatively, if you want to run a script on a device, consider running a Reach script instead of the Run script playbook. The Reach script may not require a restart.
If the device's operating system won't boot up, select the Device-initiated playbook checkbox. Note that if a playbook is already in progress on the device, the option defaults to selected and it can't be changed.
- If the device's operating system is fully operational, leave the Device-initiated playbook checkbox cleared.
-
Click .
-
If the Daily action threshold reached dialog shows, the number of devices included in the request exceeds the daily threshold configured and enabled for this action. Learn more
-
If the request can't be processed on some devices due to ineligibility, a
 notification shows in the top right of the window soon after submitting the request. Click View progress in the notification to view the status of each device on the Action Requests page. If all devices are ineligible, click View devices to review each device's failure reason.
The request is created. A Playbook requested banner is added to each device's Device Details page, and a Playbook requested event is logged to Event History. If a device is ineligible for the Run playbook action, the Playbook requested event is immediately followed by a Playbook failed event.
If you submitted a console-initiated playbook:
-
The request is deployed to each device on its next successful connection to the Absolute Monitoring Center, which is typically within a few minutes for Absolute Resilience accounts, or within 15 minutes for Absolute Control accounts, assuming the devices are online.
-
If the request requires dual approval, the request remains in the Pending Approval section in Action Requests. The action isn't sent to the device until the request is approved.
-
-
If you submitted a device-initiated playbook, go to the next section.
You can track the progress of a Run playbook request on the device's Actions page, or in Action History. If a playbook fails, add the Action > Status details column to the Actions page to see the reason for the failure. Also see the article, Manual Enable ABT in Boot Sequence in the Knowledge Base.
After the request is processed, one of the following events is logged to Event History:
- Playbook completed
- Playbook failed
If you enabled the Device initiated playbook option in a Run playbook request, the following tasks need to be completed to initiate the playbook:
- Get the device's playbook passcode The unique 12-digit passcode that a device user enters during the boot process to run a device-initiated playbook. After a device-initiated Run playbook request is processed on a device, a new passcode is automatically generated in preparation for the next request.
- Initiate the playbook locally on the device
The first task is performed in the Secure Endpoint Console by an Administrator, while the second task is performed locally on the device by the device user. Note that it is best practice to maintain phone contact with the device user to guide them through the steps in the second task.
If the device is not physically accessible, a device-initiated playbook request can run automatically by ensuring that the Automated playbook action setting is enabled in the device's Playbooks policy. Learn more
Note that if the request requires dual approval, you can't complete these steps until the request is approved.
You submitted a Run playbook request with the Device initiated playbook option selected. Learn more
To allow the device-initiated playbook to run, the device user needs to enter the device's playbook passcode during the boot process.
To get the device's passcode:
- Log in to the Secure Endpoint Console as a user with the View or Perform permission for Run playbook.
- Navigate to the device's Device Details page.
- Click the Details tab.
- On the Summary page, scroll to the bottom of the first table of information and view the Playbooks field.
-
Next to Enabled, click
to view the passcode. - Leave the page open and go to the next section.
The device user must perform the steps in this task. If they are unable to receive written instructions (due to the fatal system error), contact them by phone or text message.
To run a device-initiated playbook:
- Provide the playbook passcode from step 5 to the user. Optionally ask them to record it somewhere temporarily.
- Instruct the user to:
- Restart the device. The manufacturer logo appears momentarily.
Wait for a green asterisk (*) to show in the top left of the screen and then press F6 (or Fn+F6, as applicable) repeatedly until an Absolute branded window opens.
In the passcode field, enter the passcode from step 1 and then press Enter to initiate the playbook.
The passcode window is only available for 2 minutes. If the user fails to enter a valid passcode before the window closes, instruct them to press F6 (or Fn+F6, as applicable) again. Note that after three failed passcode attempts, the device automatically boots into Windows.
A Command Prompt window opens.
An internet connection is required to run the playbook. If the following message shows in the window, the device is not currently connected.
Network Connection Options:
[C] Connect via WiFi networks
[R] Reset and retry Ethernet connection
[H] Connect to a hidden Wireless network
[X] Exit (bypass network check)
Enter your selection[C or R or H or X]:Do one of the following:
If the device is using a physical ethernet cable to connect to a network, the connection failed. Reset the connection by disconnecting the ethernet cable from the device and reconnecting it.
When the Network Connection Options message shows, enter R to try again.
Enter your selection[C or R or H or X]: R
If the device is not using an ethernet connection, you need to select an available Wi-Fi network and enter credentials.
When the Network Connection Options message shows, enter C:
Enter your selection[C or R or H or X]: C
To connect to a hidden Wi-Fi network, enter H instead of C.
A list of available Wi-Fi networks shows.
Enter the numeric code for the network you want to use. For example:
Enter your selection in number: 2
If you are connecting to a hidden Wi-Fi network, you will need to manually enter the SSID name of the network.
For information about supported Wi-Fi authentication methods, see System requirements.
Enter the password for the Wi-Fi network. For example:
Enter password for SSID 'MyNetwork': ******************
Note that it will take approximately 30 seconds to authenticate the connection.
Wait while the playbook runs. Note that the device will automatically restart to complete the recovery operation. If the Restore from image playbook was requested, the device will restart multiple times. Do not perform a manual restart while the playbook is running. If the operating system loads after a restart, the playbook ran successfully.
You can track the progress of the request on the device's Actions page, or in Action History.
After the request is processed on the device, one of the following events is logged to Event History:
- Playbook completed
- Playbook failed
If you are logged in as a user with the Perform permission for Run playbook, you can update an existing device-initiated Run playbook request by submitting a new request to replace the existing one.
You can't replace an existing console-initiated playbook.
As long as the existing request has an action status of Pending in Action History, you can submit a new device-initiated playbook to replace it. The action status of the existing request is updated to Failed and the new request is set to Pending.
The following events are logged in this scenario:
-
Playbook requested (references the new request)
-
Playbook replaced (references the existing request that was replaced)


